


Hello all and welcome to the Sports Blog Hop!

I am so glad you are here! Now you should have arrived here from Nicolette Simpson - Beyond Scrapin. If you just came by chance head over to Creations with Kathryn and read through all the exciting blog candy and start at the beginning of the hop. Below is my project! Be sure to read to the end and find out about the BLOG CANDY I am giving away!
So, our challenge today was design something sports related. Doesn't sound so tough, right? Both of my children play soccer, so I have soccer pictures coming out of my ears! I also have soccer layout after soccer layout as well, and after a while they start to run together. (Both kids have played since they were 4 years old! That is a combined 9 years of soccer pictures!) To combat my problem, I decided to create Soccer Trading Cards which fit in iPod boxes. (You can use any container you want, just alter the size of your trading cards).

First, I measured the plastic boxes and then used George and Basic shapes to create rounded corner "cards" that would fit in the boxes. (Exact measurements were 4.83 x 2.46 in.) I was able to get eight cards per piece of paper. I cut one sheet (12x12) of khaki and one sheet of bright blue. I figure each season I will change the trading card color so it will be easy to figure out what pictures are from what season. (i.e. 2007 is khaki, 2008 in yellow...)

After cutting out the cards, I began to scrap each trading card separately. Because of their small size and the desire to keep them fairly flat, this was quick and easy.

Card #1: I matted a professional wallet photo of my daughter in black cardstock. I then used Sports Mania to cut the corner soccer ball out of black and its shadow out of white. (Cut at 1.78x1.71 in.) I used a black zig marker to write the team name along the top and the year along the bottom.

Card #2: I cut a traditional 4x6 photo into a small square and matted it on black paper. I used Sports Mania again to cut the "Kick This" title frame out. I cut the title frame in blue at 2.13x1.39 in. I matted the title frame in white and adhered it to the trading card at a slight angle. The title frame has a layer for the center of the soccer ball which I cut in black.

Card #3: I trimmed another 4x6 photo to fit the card, being sure to center my daughter to the right of the card. I cut out I (heart) soccer in blue from Sports Mania at 4.83x1.00 in. I cut the heart layer out in red (.78x1.00 in.) I layered all of this to a torn strip of black paper to really make the title pop!
 Card #4: I turned this card horizontally because I couldn't get the photo trimmed to fit vertically. I matted the photo to a piece of white paper and then trimmed the mat tight on three sides. On the last side, right, I left an extra .25 inch and tore the edge. I used 3-D stickers from K & Company Peter Horjus Soccer Grand Adhesions. The three soccer balls really make this page pop!
Now that the inside trading cards are done, I have to alter the outside of the box.


The first thing I did was wrap 15" of black polka dot ribbon (3/4 in.) around the bottom edge of the box. I then wrapped 15" of black polka dot ric-rac (1/2 in) around the lid edge. I used glue dots to hold the ribbon down where the ends meet. (The ATG adhesive held the rest of it no issue!)
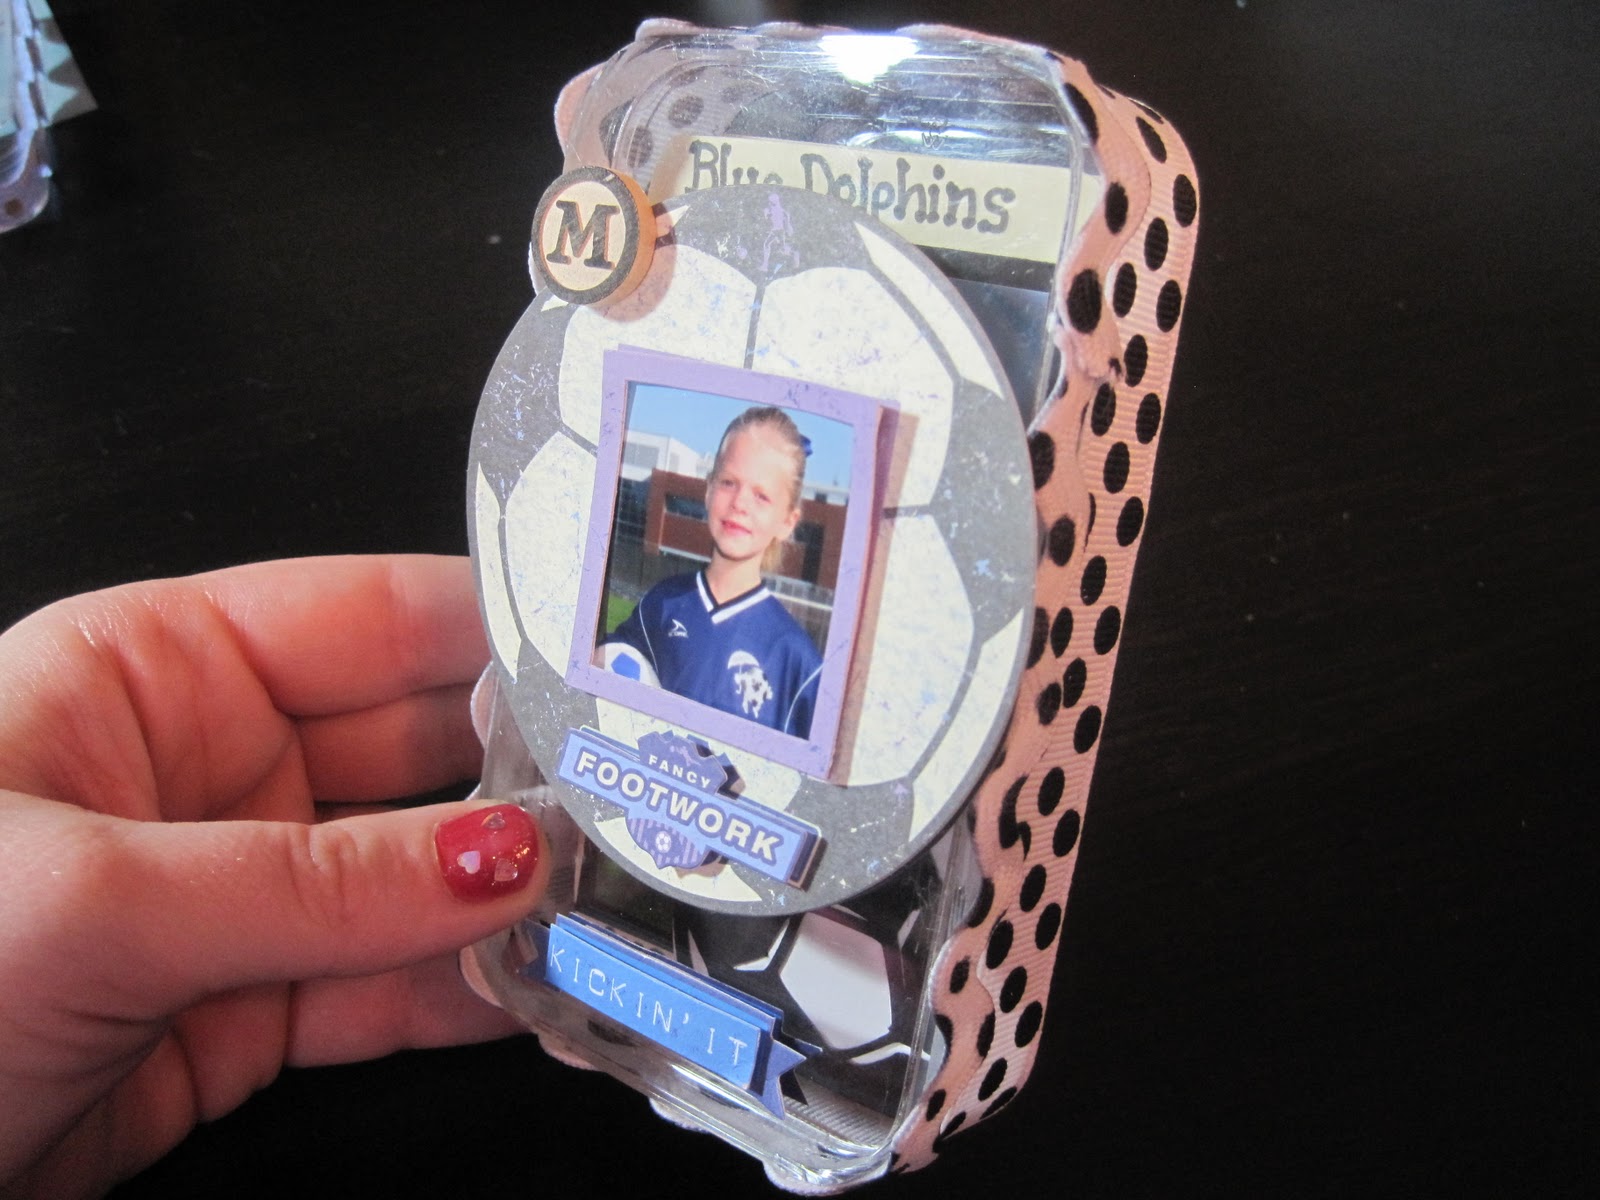
I then added two more K & Company Peter Horjus Soccer Grand Adhesions Stickers. The large soccer ball sticker is 3-D and came with the small photo frame already attached! I trimmed an extra photo of my daughter to 1" square and carefully slid it into place. I then added the "Kickin' It" sticker to the bottom center of the box. Lastly, I added a small wooden round "M" to the top left side of the soccer ball for my daughter's initial.
Of course, having two kids, I couldn't stop at one box, so I made a 2nd for my son!

This is another plastic iPod box. This time I adhered a khaki rounded corner rectangle to the top of the box and put on the #1 stickers. (Stickers from Pebbles Stickers Snpsht Wrd Stckrs Soccer.) I used a black zig marker to write my son's name.

I then put 15" of blue ric-rac with brown polka dots around the bottom edge of the box.


Card 2: I trimmed a 4x6 photo and matted it on white paper. I then used Hot Off the Press Brad Buddies (Soccer!) to put the metal, blue goal net and soccer ball onto another square of white paper. (The soccer ball is actually a brad!) I then carefully trimmed around the netting and ball to create a white shadow.


Card 4: I matted a photo with white paper and then used another Brad Buddy from the same package. The Goal is a metal plate, while the star and dot on the exclamation point are both brads. I put the brads through the metal plate and then carefully trimmed the brad flaps that you could see. I didn't want to actually send the brads through the back of the cards so I can journal on the back.

Card 5: I matted another photo on white, trimmed three sides tight, and left the bottom long. I tore across the bottom of the mat and wrote "Goalie in Training!"
I hope you enjoyed my projects; I know I did! Now, on to the blog candy! First, become a follower and then leave a comment on this project. (Open only to people in the US due to shipping rates! Sorry!) At the end of the hop I will be announcing my winner. So please check back then!! Now, you are off to
Here's the blog hop order with links for your convenience!1) wamfamily - Creations with Kathryn – http://wamfamily.blogspot.com/
2) TX Scrapper Mom - TX Scrapper Mom -http://txscrappermom.blogspot.com/
3) TinaB - Tina Time - http://ollieanddextersmommy.blogspot.com/
4) Ms Dee - Dee's Special Things - http://www.deesspecialthings.blogspot.com/
5) Lissa - So Many Crafts, So Little Time http://www.somanycrafts.wordpress.com/
6) CraftyScentiments - Crafty Scentiments –http://www.craftyscentiments.blogspot.com/
7) Scraphappybette - Believe, Dream, Create –http://www.believedreamcreate.blogspot.com/
8) bzymomof9 - Life on the Bright Side – http://quiverofangels.blogspot.com/
9) Jenne - Fairy Craft Mama – http://www.fairycraftmama.blogspot.com/
10) Nicolette Simpson - Beyond Scrapin –http://www.beyondscrapin.blogspot.com/
11) JenMcCalley - Scrappin at McCalley House – http://mccalleyhouse.blogspot.com/ You are here!!!!!!
12) VinDeeLoo - VinDeeLoo's This 'n That – http://vindeeloosthisnthat.blogspot.com/
13) roxybonds - RoxyBonds - Scrappin – http://roxybonds-scrappin.blogspot.com/
14) LisaLisa&ScrapJam - Peanuts & Pepper Paper Crafting – http://peanutsandpepperspapercrafting.com/
15) LeAnnSnyder - LuvToScrap – http://leann619oh.blogspot.com/


