CLICK HERE FOR FREE BLOGGER TEMPLATES, LINK BUTTONS AND MORE! »
Showing posts with label Opposites Attract. Show all posts

Friday, August 19, 2011

Teacher Bulletin Boards with the Cricut and Gypsy

I said a small prayer while I connected my Gypsy to the Cricut because I had tons of stuff to cut for school; in fact, I had 8 12x24 mats worth of stuff!  Just in the first go around!  I have an bug and/or insect theme in my classroom this year, so I had a blast using the Cricut to make cute bulletin boards!  Here are photos of what I did! 
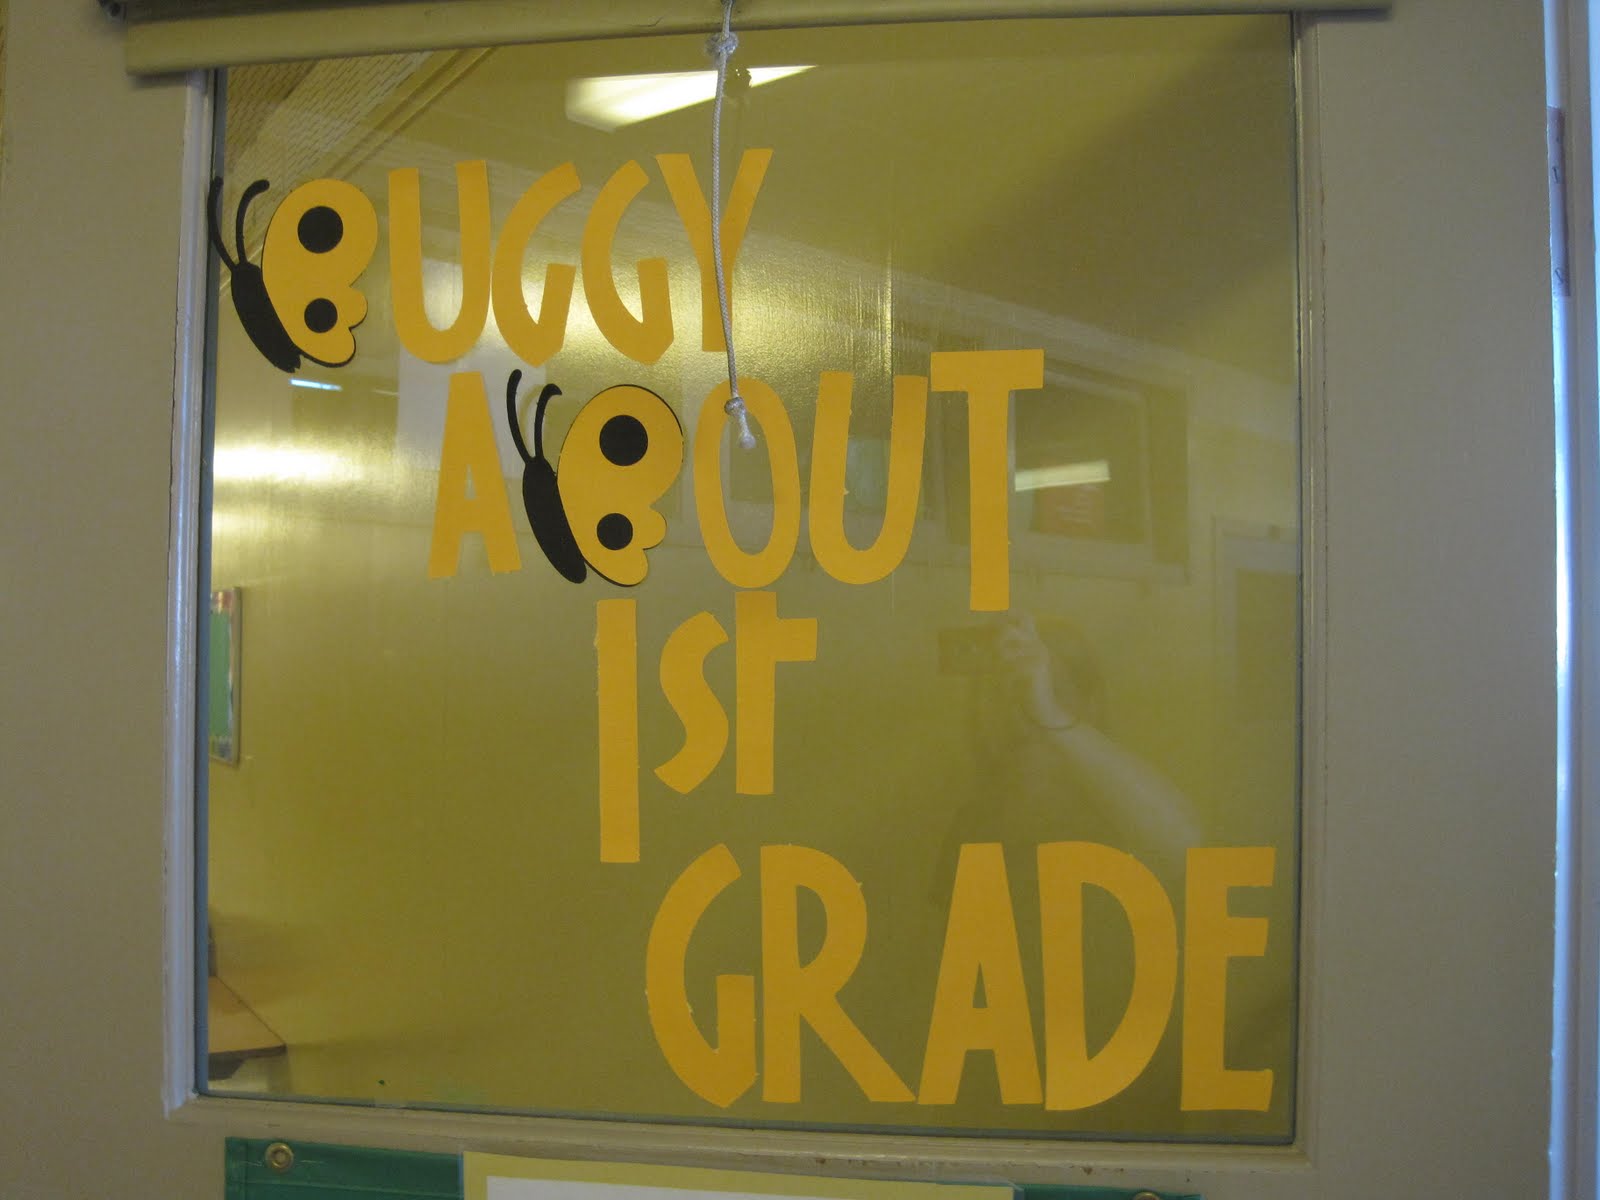
This is on the outside (facing out of my open) classroom door.  It says "Buggy About 1st Grade."  I replaced the letter B's with butterflies and customized their wings to have the circles in the right spots to make it look like B's.  I cut all the letters at 6".  I used my ATG gun to stick them to the window and I LOVE how quick and easy it was!  I think the font is Jubilee.

Above my bookcases is the saying "Buzz Worthy Books."  I think  the font is Opposites Attract.  You see, I was creating and cutting really, really late at night and my mind was a little mushy and I can't remember what I used for sure!  These letters are cut at 6 inches as well.

 I made two cute Create a Critter bumblebees to accent the title.  :)  Love them!

Horrible picture because the lamination is reflecting, but this is my CAFE wall from the Daily 5 book.  If you are a teacher and don't know about Daily 5, go find the book!  It's wonderful! But, do first graders know what a cafe is?  Probably not, so I rearranged it to spell FACE, as in "The FACE of reading."  (Each letter stands for a reading skill:  F-fluency, A-accuracy, C-comprehension, E-expanding vocabulary.  When I teach a strategy for any of these, it is listed under the correct category for the kids to refer to, thus the columns!

Here's part of my library, with the heading and then the empty focus wall.  The items reflecting are the labels for my focus wall.

Whew!  We just adopted Bridges, and here is a picture of the Number Corner for first grade (ie. the calendar).  Luckily I found these small pocket charts at Target to help organize the area!

Lastly, I did "Great Work Spotted!" and hung it up on my windows.  I wish you could see the colors, but the shadow is black and the actual letter is red.  They are cut at 6" and are Gypsy Wanderings font.  I added two Create a Critter ladybugs as well.  I will post kids work underneath on the windows.
Hope you enjoy!

Monday, August 15, 2011

Have a Sweet...Candy Bar Holder for Teacher

In a blatant scraplift from "In Love with a Bug" I couldn't resist making one of my one candy bar holders for a teacher!  Check out the original blog where I got this idea!  http://inlovewithabug.blogspot.com/

My son and I made this together.  He picked the papers, font and ribbon!  The scantron form background paper is from The Hittin' the Stacks Paper Pack from DCVW.  The blue title block is a bulk blue cardstock. We cut the letters (Have a at .8 inches, Sweet at 1.2 inches) from Opposites Attract.  The apple is from My World and we used a bunch of little scraps.  It was also cut at 1.2 inches.  We put the ruler ribbon along the bottom of the title block and added a black fiber knot for a little emphasis.

Inside is much the same!  Another blue title block with the title cut in black from Opposites Attract.  I added a little red jewel for some added color.  See the envelope part?  Above the scantron?  That's where a regular size Hershey bar will slide in.  My 5th grade son thought this was "cool enough" for him to give to his teacher...none of those silly cards...Thank goodness I found something he is willing to hand his teacher! ;)

Thursday, July 21, 2011

Thankful Thursday Design Team Post--Movies!


Movie theme???  Hmmm...I had a great idea for this project a couple of weeks ago and then it left me.  I thought, and thought, and thought...and then remembered the photos of my daughter taking part in a Dr. Seuss musical at school!  Ah-ha!  Inspiration struck! 
Here is the current project for the Design Team and love how this layout turned out! 
"Seussical the Musical"
March 2011
My daughter's class worked with their fabulous music teacher and these 2nd graders put on a great musical based on all of Dr. Seuss's books.  It was hysterical!  The songs were about his books and each child had a set of tongue-twister lines that helped the story line flow.  It was fabulous to watch the kids perform!


This layout really evolved and took two days for me to get "flushed" out.  This isn't my normal style as I normally just get it done...I even fell asleep last night thinking about how the layout should look.  The great news, I LOVE THIS LAYOUT!  :)  I cut one piece of Color Mates (light autumn red) cardstock  into four, three inch pieces.  I inked the edges with black ink for added definition.  I then cut "Suessical the Musical" from Opposites Attract.  I used scrap papers for all the other cuts, so I have no idea manufacturers!  (Love using up my scraps!)  I then cut out fish (Red Fish, Blue Fish) from An Ocean of Words.  I used a black pen to add stitching detail and fins to the fish.  A couple of googly eyes completed the look!
Then I added two green eggs (Green Eggs and Ham) from Smiley Cards and inked their edges as well.  I used the Peachy Keen stamp set and black ink to stamp the cute faces.  I used foam tape to pop one up a little bit for some dimension.

My favorite embellishment is this Cat in the Hat with his stack of books.  Do you remember him balancing everything????  Well, I thought it would be cute to balance a stack of books and then a photo on top!  I LOVE how this turned out.  I cut the books from Locker Talk and cut the shadow (black) and then the books twice (once in green and once in blue).  I had to hand piece the blue books on top of the green, but it was worth it!  I even added more foam tape for added dimension.  I then cut the "pages" out of textured white cardstock.  I thought it might look more like a stack of pages this way.  I then found a clip art image of The Cat in the Hat online (a coloring page!) and fussy cut him out.  I trimmed off the rest of the page as all I wanted was him and his hand to hold the stack of books.  I colored him with colored pencils and then popped him up with foam tape as well.  I even tucked part of his glove behind and then in front of the books to look like he is really holding them!  Lastly, I drew wavy lines to write my journaling on; once the journaling was dry, I carefully erased the pencil marks.

Thanks for looking and I love comments!
We have an awesome prize this month, it's a Post-it prize pack!! Don't forget to head over to Crazy About Cricut at http://crazyaboutcricut.blogspot.com  and enter your family's project!


Thursday, July 7, 2011

Thankful Thursday Design Team Post--Red, White and Blue!

Welcome to Thankful Thursday's  Red, White and Blue Design Team Posts!  

One would expect a 4th of July layout or craft, right????  Well, I'm thinking outside the box, once again, and I scrapped a set of pictures from our visit to see Santa.  (Yes, we're celebrating Christmas in July on my blog, or so it seems!)

Here's my completed 2 page, 12x12 layout!

I used a great patterned paper (maker/name unknown!) that is silvery blue with white swirls and red, white and blue dots.  
I matted a border of photos in silvery blue and then matted again with just a thin strip of red showing on the right (for the left border)!  I then matted the professional Santa picture with a wide red and skinny blue mat.  I cut the "Santa" title using Opposites Attract.  It's my newest Cricut Cartridge and I love it!  I added a few crystals to the title for a little sparkle.

I then created a photo block for the right hand page and matted the photos onto a large piece of silvery blue.  I then double matted in red.  I used Queen & Co's Shaped Bling Swirl Red Heart to add a little something to the photo block. I then used little crystals in red and clear to stick on top of every red and clear dot on the background paper.  I purchased these crystals in the Dollar Bin at Michael's and I love them because they already have adhesive on them!

In the end,  a fun red, white and blue layout showing that you can "break the rules" and still follow them at the same time!  Hee  hee! 

Thanks for looking and I love comments!
We have an awesome prize this month, it's a Post-it prize pack!! Don't forget to head over to Crazy About Cricut at http://crazyaboutcricut.blogspot.com%20and/  and enter your family red, white and blue project and maybe win the great prize pack!